Sending Input: Inline Line, Snippets & Paste
vord gives you several ways to get something into a running session’s terminal without clicking into the tile or opening Focus mode first. This page rounds them all up: the inline line at the bottom of a tile, reusable command snippets through ⌘K, pasting an image so claude/codex/kimi can actually see it, what happens when a session refuses input, and the chip that fills in a password prompt for you.
The inline input line
Section titled “The inline input line”Every Normal- and Cockpit-density tile has a thin › field at its bottom edge with the placeholder “write…”. Click into it — this doesn’t steal the tile’s selection — type, and press Enter to send the text straight to the session’s terminal as one line plus a carriage return. It works identically for claude, codex, kimi, and a bare shell.
It’s deliberately single-line: there’s no multi-line editor here. For a multi-line prompt, use Shift+Enter in the real terminal instead (see Working in the Terminal).
Pasting an image (Cmd+V)
Section titled “Pasting an image (Cmd+V)”Terminals don’t understand images — they only understand bytes and file paths. So when you copy a screenshot or a photo and paste it into a session, vord has to bridge that gap:
- Copy an image to the clipboard (a screenshot, an image app, a browser).
- Press Cmd+V in the terminal area of a session, or in the tile’s inline input line.
- vord writes the image to a temporary PNG file and sends the path into the terminal as a real bracketed-paste event — not a typed string.
The reason this matters: if you just typed a raw file path yourself, claude/codex would treat it as text, not an image. Bracketed paste is what tells the agent’s CLI “this incoming text is a paste, not keystrokes” — the same signal a real terminal paste gives it — so it recognizes the path as an attached image instead of a line of ordinary input.
In the tile’s inline input line specifically, the pasted image shows up as a readable [Image #1] token (the same idea as Cursor’s paste UI) rather than a cryptic temp path. Type any text you want around it, press Enter, and the token expands to the real file path when it’s sent.
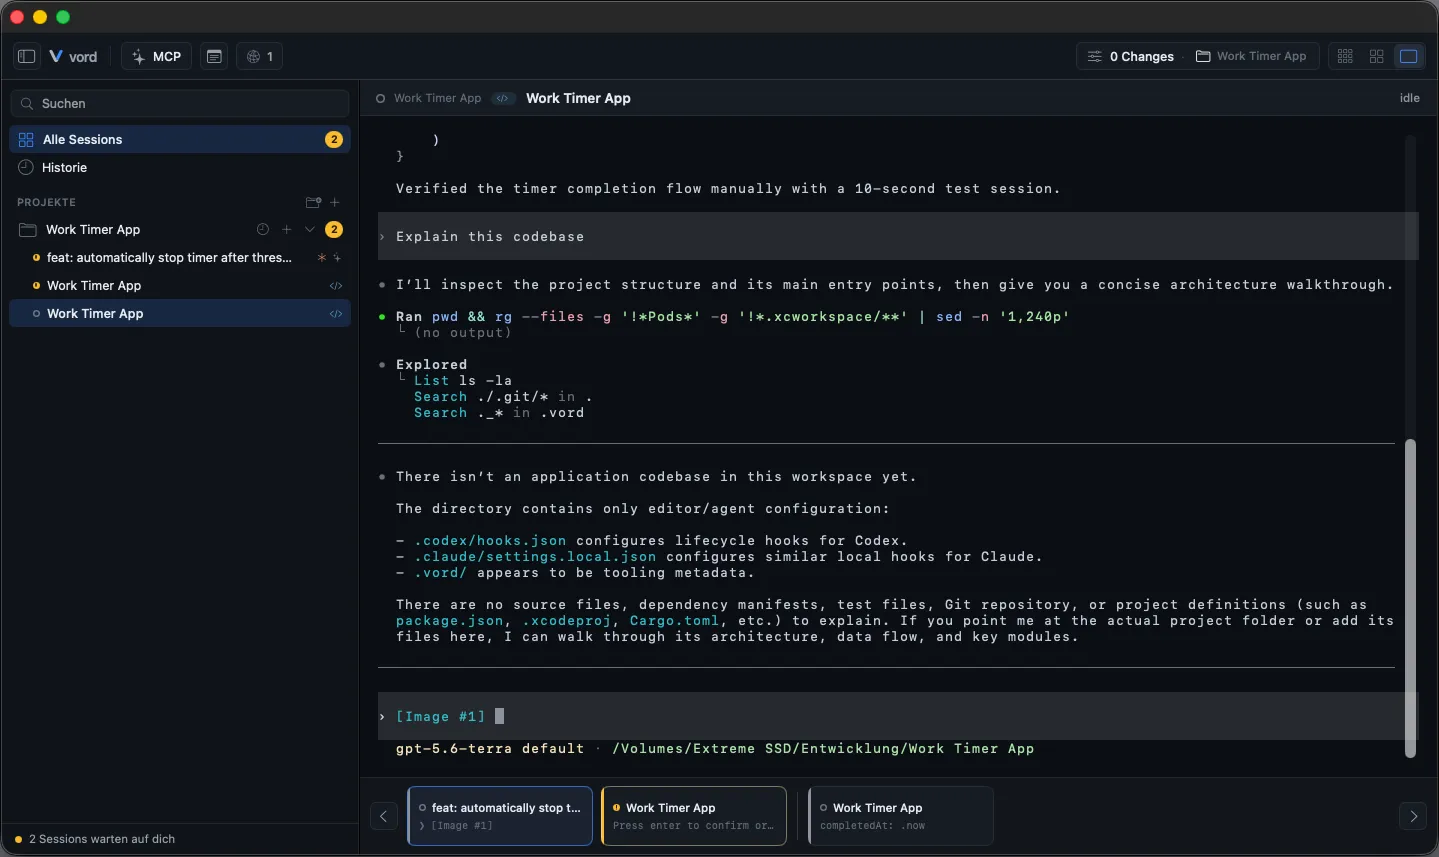
Works for claude, codex, and kimi — with one per-agent difference under the hood: claude and codex receive the raw file path (their TUIs turn it into an [Image #1]-style chip themselves), while kimi receives the path as an @-prefixed file reference (@/path/to/image.png), the only form kimi’s composer recognizes as an image attachment. vord picks the right form automatically based on the detected agent. Images sent from an iPhone or Android companion follow the same per-agent rules on the Mac side.
With Codex, vord waits after a fresh start for the regular input line. The provisional input during startup cannot attach images yet. vord also holds back images when a dialog is open or a Codex session is paused with Ctrl+Z. As soon as Codex can accept images again, waiting groups are delivered once in their original order. Each image and the shared accompanying text are inserted separately so that multiple images are preserved as attachments.
This protection also applies to Codex with direct pasting via Cmd+V. That inserts the image without sending; you press Enter yourself. A send from the tile input or from the companion device is sent together with its accompanying text. If it has to wait because input is running, vord reports it as deferred instead of already inserted. You do not have to send it again.
Command snippets via ⌘K
Section titled “Command snippets via ⌘K”If you have commands you type often — a build command, a git alias, a boilerplate prompt — save them once as a snippet and drop them into any session from the keyboard.
Managing snippets — Settings → Workspace → Saved Commands:
- Click New snippet.
- Fill in an alias (the name you’ll search for), the command itself (multi-line is fine), and a scope: Global (available everywhere) or a specific project.
- Edit or delete existing snippets from the table (hover a row for the buttons).
| Column | Meaning |
|---|---|
| Alias | The short name you search for in ⌘K |
| Command | The text that gets inserted — can be multiple lines |
| Scope | Global, or the project it’s pinned to |
Using a snippet in a session:
- Select the session you want it in — the snippet always goes to whichever session is currently selected, never broadcast to several tiles at once.
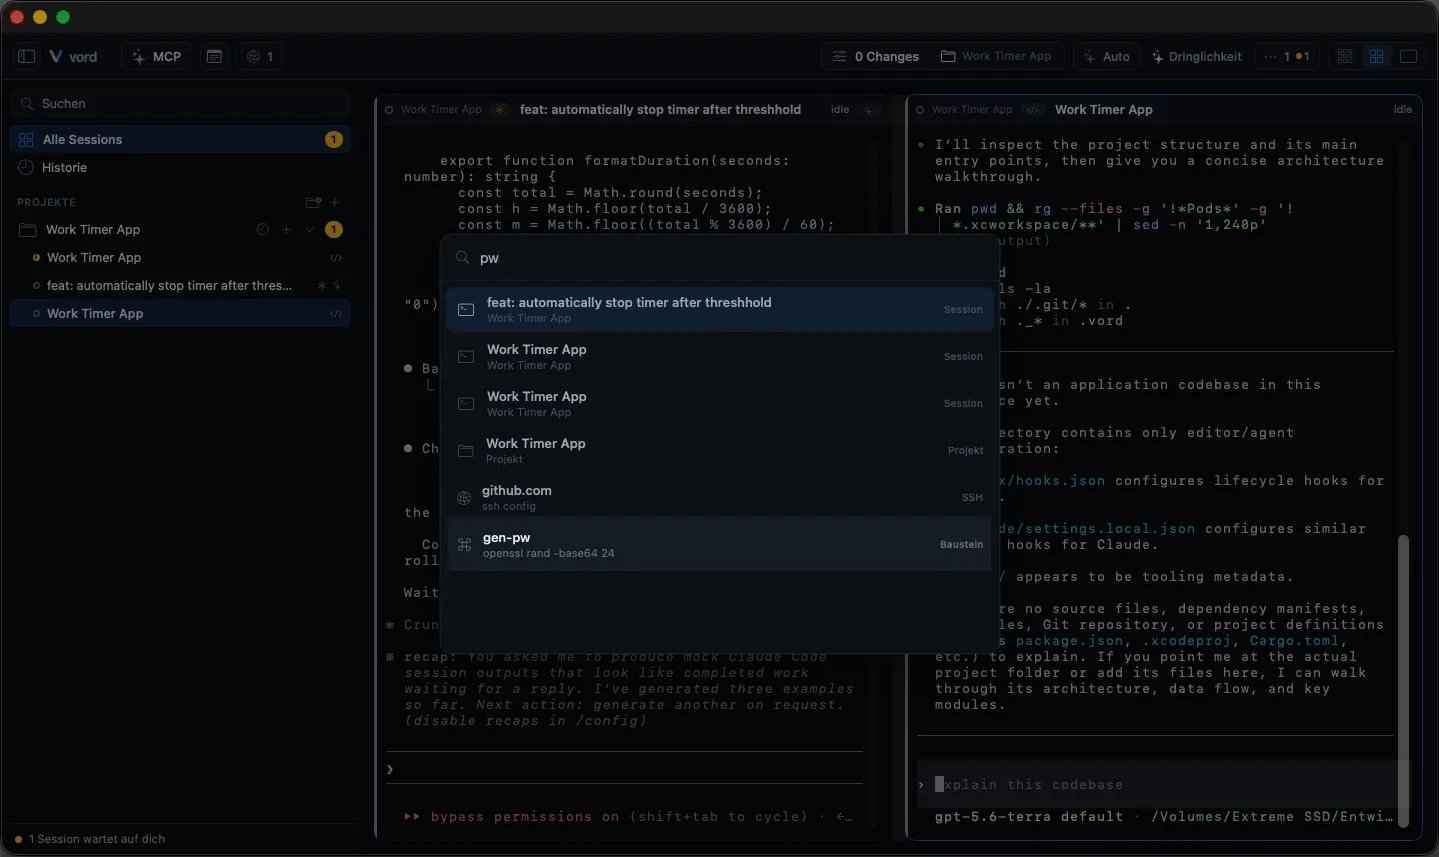
- Press ⌘K, type to filter by alias.
- Press Enter to insert the snippet’s text and run it immediately, or Shift+Enter to insert it without submitting (so you can edit it first).
When input is blocked
Section titled “When input is blocked”A few situations stop text from reaching a session, on purpose:
- The session has ended. There’s no live process to type into. The tile’s inline line is replaced by a Resume button instead — see History & Resume.
- A permission, question, or plan-approval box is open. ⌘K snippet insertion refuses to paste here (see above), because it could accidentally answer the box for you. The inline input line and the real terminal, however, still work for typing into a box — since it’s the same PTY, you can type your answer directly, the same way you’d answer it running claude/codex in a plain terminal. See Answering in the box itself for how vord deliberately avoids rendering its own buttons over an agent’s box.
- No session selected. Both ⌘K snippet insertion and (implicitly) the inline line need a specific target; without one, actions that require a session beep rather than guess.
The password / sudo paste chip
Section titled “The password / sudo paste chip”When a session’s output ends in something that looks like an interactive password, passphrase, or sudo prompt, a small chip appears floating at the bottom-right corner of that session’s terminal — a shortcut to fill in a password you’ve already stored in the Keychain, without typing it or leaving it in your shell history.
- Click the chip and vord reads the matching password from the Keychain and inserts it into the prompt for you, followed by Enter.
- The label adapts to what was detected: “Insert password” (or “Insert password for
<host>”), “Insert key passphrase”, or “Insert sudo password”. - If the Keychain read fails (no entry saved, for instance), the chip switches to a generic “No password saved” state — it never shows the password itself, and never shows what went wrong at the byte level.
See also
Section titled “See also”- Working in the Terminal — search, copy, reflow, and the rest of the real terminal underneath all of this
- Responding to a Waiting Session — the inline input line in the context of 🟡 status and answering boxes
- Keyboard Navigation — the other ⌘K, the one that navigates instead of pasting
- SSH — the password vault behind the paste chip
- Settings reference — where Saved Commands and other settings live in one table